Sunday, February 28, 2010

Day 59 ~ Revised A Few Cards

Sundays are my days to "rest" on the sabbath, anyone with small children know that means you get to sleep in for an extra half hour if you're lucky. So, I don't get much time to do crafting.

I've had these little cards around for awhile and they didn't have the insides finished, so I will be fixing up my baby cards on Sundays and posting them in my Etsy Store. There is only one of these particular cards and I don't have the supplies to make another of it, so if you like it you better hurry on over. =)

Blessings my friends. Dee =)


Little Girlie Card"


Inside of the girlie card:


Little baby boy card:


Inside of little baby boy card:


Don't forget to go to my new blog tomorrow for my weekly giveaway!!!!

My New Blog!!!! GO Check It Out!!!!

So.... I started up my Etsy shop as well as a new blog that will be related to the shop. I'll be having weekly giveaways starting tomorrow and other fun things going on there. So, go check it out and have a great Sunday!!!!

My Etsy Shop

Dee's Bugaboo Boutique Blog

Saturday, February 27, 2010

Day 58 ~ Saturday Edition

Wow! I got a card done on a Saturday and it's not even 3pm yet. Usually I don't get much of a break on Saturdays but Aizen (pronounced eye zen) was fascinated with his wooden Thomas the Train set and I got to get this card done. I set it up in my nook so he could come see me for kissies when he wanted.

So, here's my card for today. This is one of my favourite stamps and I had so much fun glittering up the wings on the bee.

Have a great weekend all and I can't wait to hear how your weekend went. Blessings!!!


Friday, February 26, 2010

Day 57

Had a bit of fun again with this Stamping Bella stamp. Did it with 5 different sentiments and had a lot of fun colouring it in. Enjoy !!


Thursday, February 25, 2010

Day 56 ~ Thanks

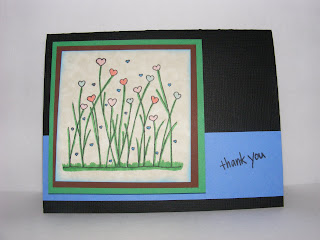
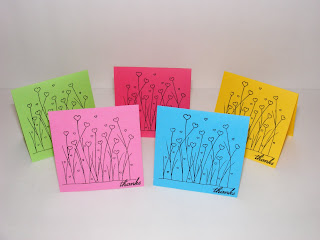
And featuring another stamp from Stamping Bella, this is her Hearty Grass Stamp. I got this on my trip to her store a few weeks back. I used a thanks stamp that I have with it as well.

I'm working on getting another blog up where I can sell my cards. These ones are adorable 3" x 3" cards and are being sold 5 for $4.00 plus shipping, they come with envelopes as well. You can buy them as a rainbow or one specific colour, just let me know. =)

Dee's Thursday Tips ~ Paper Storage

Since I didn't get to this last week, I'll give it a go this week. 2 weeks ago I shared how I keep track of what cardstock comes from what place. Now I'll show you how I store all those papers. Since I'm a cardmaker and do digital scrapbooking, I don't have a huge need for 12" x 12" solid cardstock. I tend to buy mine in 8.5" x 11". The solid cardstock that I do buy in 12" x 12" (there are a few because I just love the texture of them) will usually get cut down into a 8.5" x 11" size.

~ ~ ~ ~ ~ ~ ~ ~ ~

I have them in different containers. These are rubbermaid magazine holders, I happened to find these ones at the dollar store. I prefer them over the ones I have on my bottom rack (I'll share those another time when I get my craft nook all finished =D) because the front panel is higher up and keeps the papers in there more securely.

They are sorted by brand and then by colour. I don't mix brands even if they are the same shade of colour. For me, it makes it too hard to remember what paper belongs to what brand. On the left are my solids by 3 different companies. The far 2 are by the same one and the others are different.

On the right side are 1. a collection of 8" x 8" pad I got because it was more masculine and some inserts from 8" x 8" scrapbooks, 2. a collection of super cute girly designs that I got on sale for $2.00 each and bought 10 of them (each paper pack came with 36 papers!!!!) and the last bin has the cardstock that I print on for my digital stamps.


I wanted to show off my favourite girly papers, I don't know what I will do when I run out of them because they don't sell this paper pack anymore. /cry


Here are the bins on the left side.


I thought I would show a shot of how I know what company they come from. I keep one sheet from each pack and put it in the side for easy reference.


Thanks so much for looking. It's a system that works really well for me and I enjoy buying cardstock way too much. hehe

Wednesday, February 24, 2010

Day 55 ~ More Sickie Bugs! hehe

I had a couple more of these images punched out and thought I'd make some more cards with them today. I had 4 printed per sheet and I can't wait to get some other projects done so I can get started with these little buggies again. Blessings =)


Tuesday, February 23, 2010

Day 54 ~ Heard You Caught A Bug?

I'm back on the train to making cards again. I got the free digi stamp from DigiStamp Boutique and just HAD to make a card with it. I made the masculine version and then decided to make a girlie version of it.

So, here is the front of the first card:


Inside of the 1st card:


Here's my girly card:


Inside of the girly card:

Check out DigiStamp Boutique, they have some really cute stuff that I am hoping to get after I get my slice. Blessings =)

Monday, February 22, 2010

Day 53 ~ Tea Party Invite Demo

So this post is going to be super picture heavy. I am working on a joint birthday party for a couple of sweet little girls who will be having a tea party. So, here are the sample invitations I have made and am just waiting on what decisions the mama makes and I'll get right on them.

Here are the pink options for the main card. I didn't want to make 2 cards so the first one has the flap from the back to show the different ways to make it. I handstamped the little daisy on in pink and then white ink.

Here is what the card looks like when you open it. It's a slider card and I got the idea from a Hero Arts video on youtube and thought it would be perfect for this invitation. The 2nd picture is the back side of the invitation. Ignore the little hole on the wrong side of the sample, I punched it wrong and didn't feel the need to make a new one since it's a sample card.


This is the other option of a purple card base with the same colour of pink inside. The daisy is again handstamped in a purple then white ink.


Here is what the inside of the invite will look like. I need to tweak the actual invitation a bit and have the writing a little more to the right and not so centered b/c of where the hole is to make it a slider card. That's what I learned about making things with a hole in them. hehe

This is Lily and she is a fairy from Pink Cat Studios, she's a digital stamp and I A-dore the stamps from this place. I made her 3 different ways and in each pair the the colours of the wings and the big heart are either a pink or blue. Also the heart on the antanae, the hearts on the dress and the heart on the cupcake all match in each pairing. I then used my sickles glitter to accent parts.
Lily Example # 1

Lily Example # 2

Lily Example # 3


The next set of stamps are from Stamping Bella and this is Scarlett. I had SO much fun at her store last week while hubby was on vacation and picked her up. She is A-dorable!!!! I did each of the pairing similar but different teacup colours in pink and blue.
Scarlett Example # 1

Scarlett Example # 2

Scarlett Example # 3
I also used a white and light purple ribbon to make it into the slider card and I can't wait to get started on these. Thanks for looking. =)

Time To Get Back On Track

Well I got a bit off track with doing my card a day because of having our daughter's death anniversary, getting really sad and depressed over that, having my hubby home on vacation and sick kids.... so, I'm back to card making. I just finished up the demo's for a tea party birthday invite yesterday so I will be sharing those in a bit. So cards 45 - 52 (on the 365 calendar will not be made), but I'll have some more to share tomorrow. (((hugs all))))

Thursday, February 18, 2010

Ooops! I've Been Busy

Ooopies I've been busy. Hubby is on vacation and we've been moving things around in rooms and just enjoying having him home. I'll do a major update this weekend when he's back at work. So.. until then... happy crafting!!!

Saturday, February 13, 2010

Day 43 and 44 ~ Finishing Touches On Shauna's Order

Yesterday and today I was making envelopes and putting on the finishing touches for Shauna's card order. Here is a sneek preview of your order hon, I'll be mailing them tomorrow and will let you know how much it is for you to send with paypal. Thanks for the order girl!!!!


Friday, February 12, 2010

Day 42 ~ Melody's Valentine's ALL DONE!!!!

Finished up Melody's Valentine's for her class yesterday and it was day 42 yesterday. I waited on taking pictures so I could get pictures of her this morning in her heart shirt and holding her basket. So, here they are:


Look at my happy little Valentine Girl!!!! She is SO excited to give these out to her friends at school, I hope she has a great day at her class party!!!

Thursday, February 11, 2010

Day 42 ~ Dee's Thursday Tips

Today I wanted to show you a little thing I do with my cardstock.

I like to buy colour group packs and they come in 8 1/2" x 11" and are usually 5 different colours to a pack. Here are an example of two that I really like. I have several that have various shades of blues or pinks. Once they come out of the package they go into one of my holders based on colour and shade.

If you think about that, all the colours mixed in together, when one runs out I would probably have a hard time remembering what paper pack it came from. The sheet that comes with it is glossy and not exactly the easiest to match things up with. So... here is what I do .....


When I get a new pack of paper, I use my 1 1/2 " scallop punch (I just adore the scallop shape) to cut out a shape of each cardstock. When I get one of each colour, I put the name of the paper pack and company at the top of my reference paper.

In the right hand corner (just click the picture to make it bigger), I write down where I bought it, how much it was, how many papers there are, what the size is and how many of each colour.

If you look at the first set of colours, you will notice that there is a little bit of writing under the middle circle. That tells me that the pink there is the same as the one in the south beach cardstock pack.


This is what it looks like in my binder. When the paper runs out, I just have to match it up to the colour in the binder. It also comes in handy when I am wanting to use a designer paper, I can just hold it up to the little samples and see if it will look good or not. This is also my binder that has all my stamped image examples. I'll be doing that as next weeks thursday tips.


Hope this little tip helps you to keep things more organized so you can run out to the store when your favourite colour runs out and you're in the middle of an order. hehe